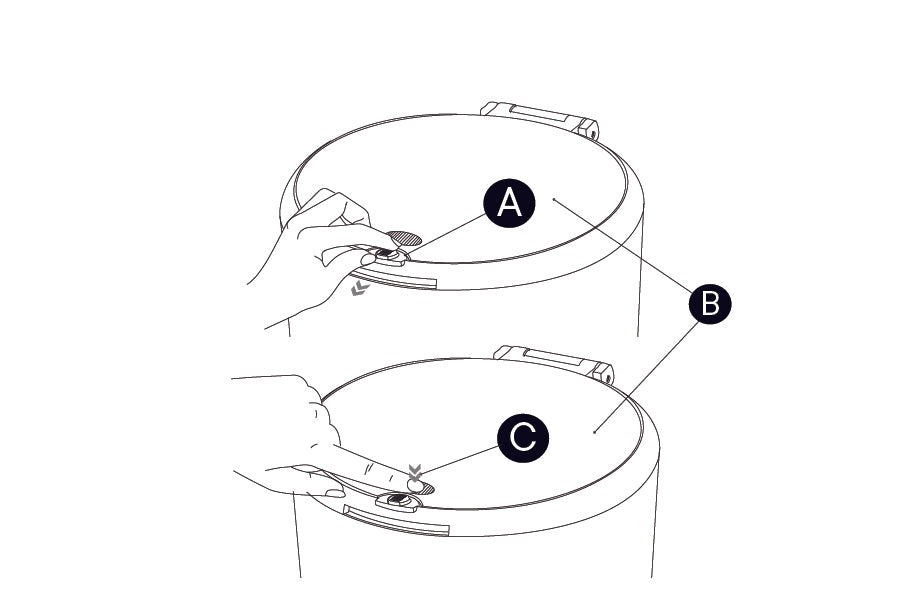
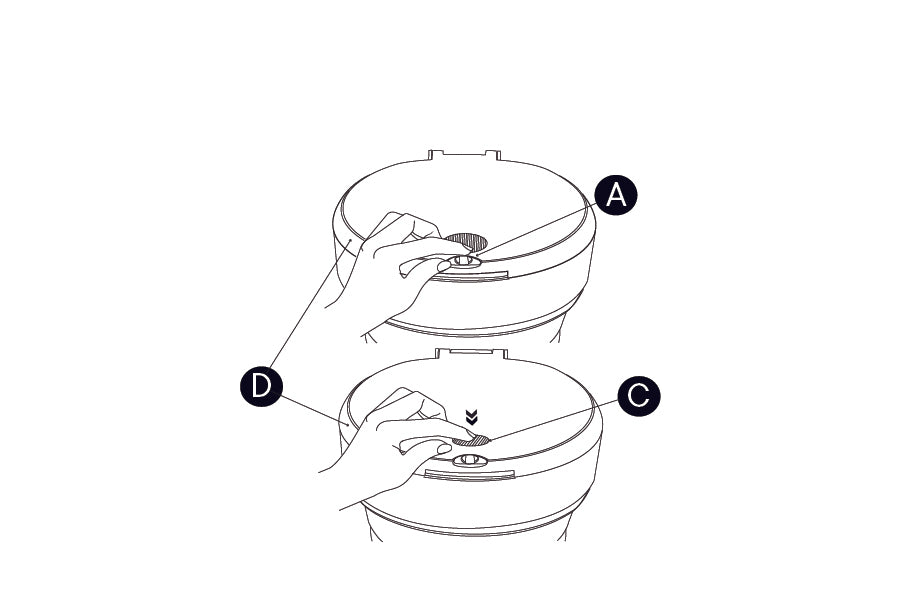
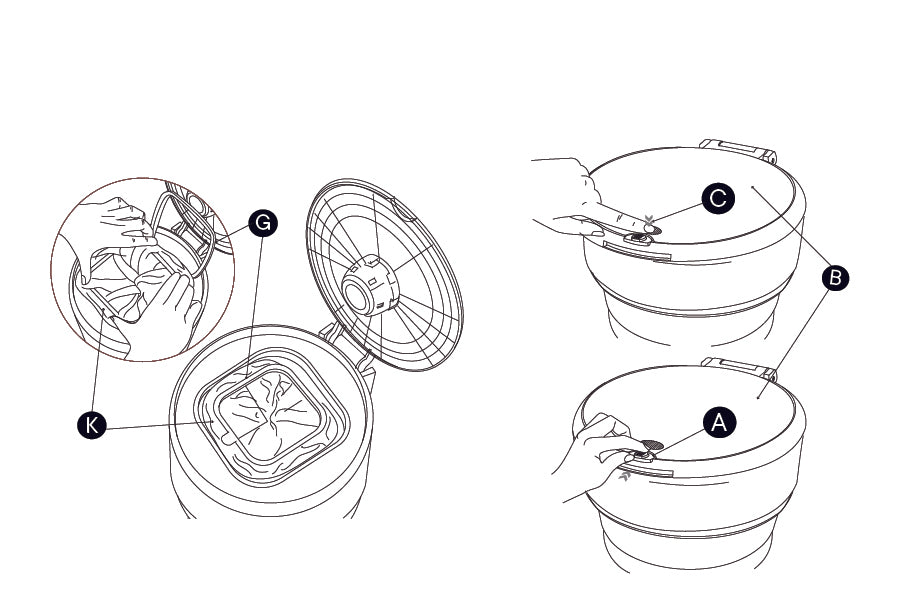
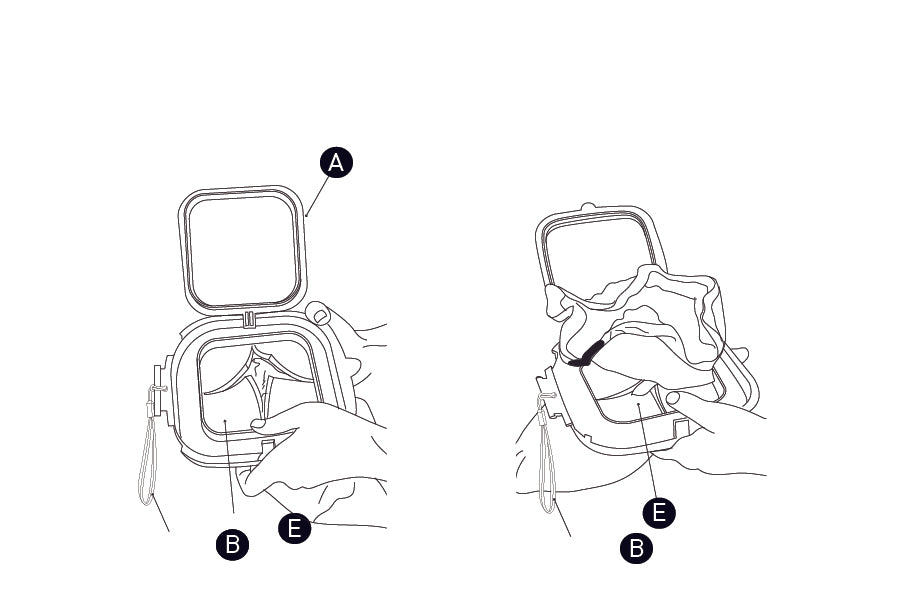
Step 1: Tear off a PurePail™ Bag. Slide open child safety lock (A). Push textured oval spot (C) to raise PurePail™ lid (B).
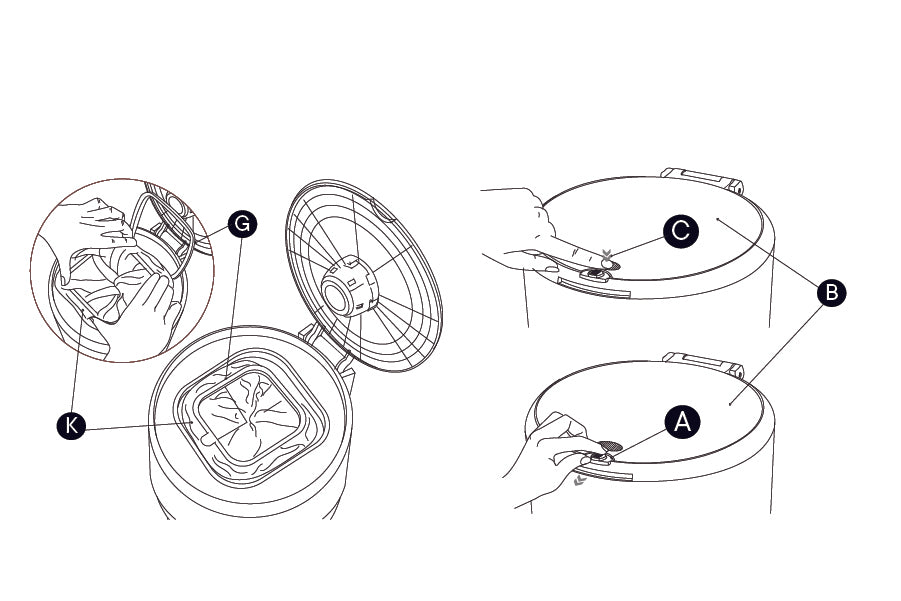
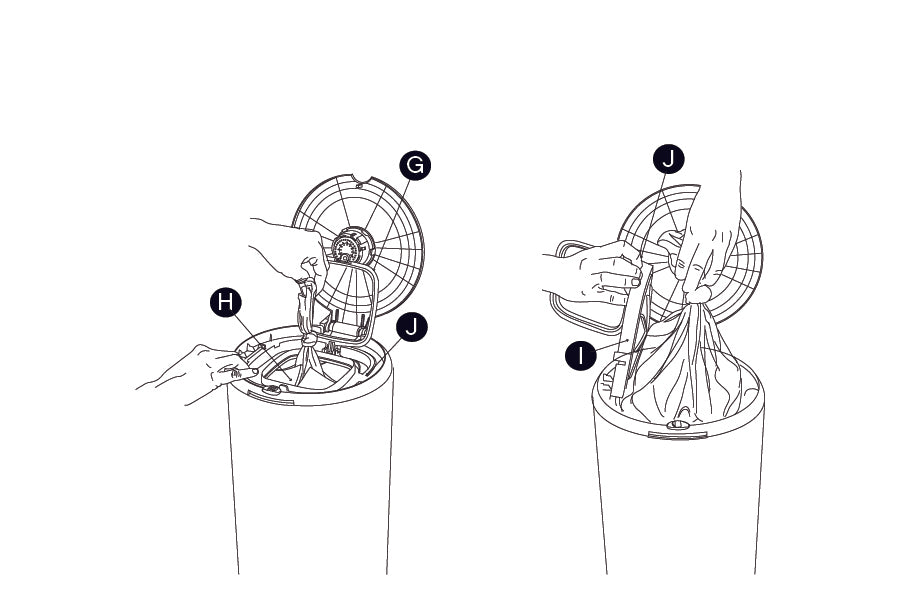
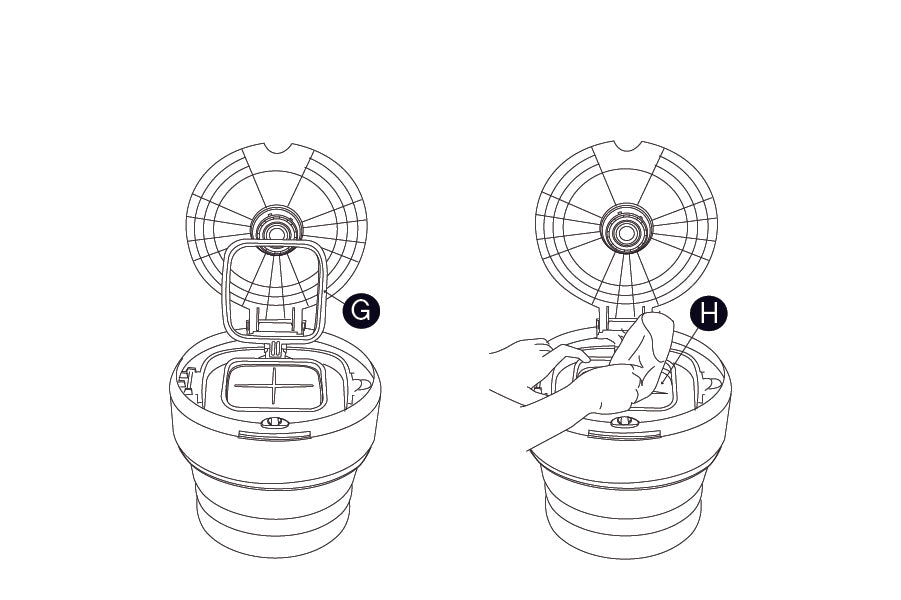
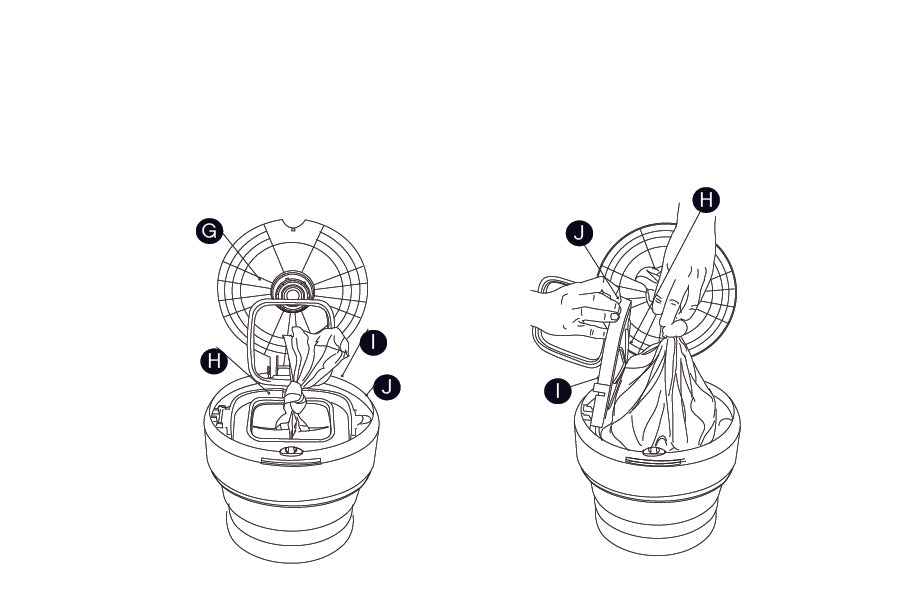
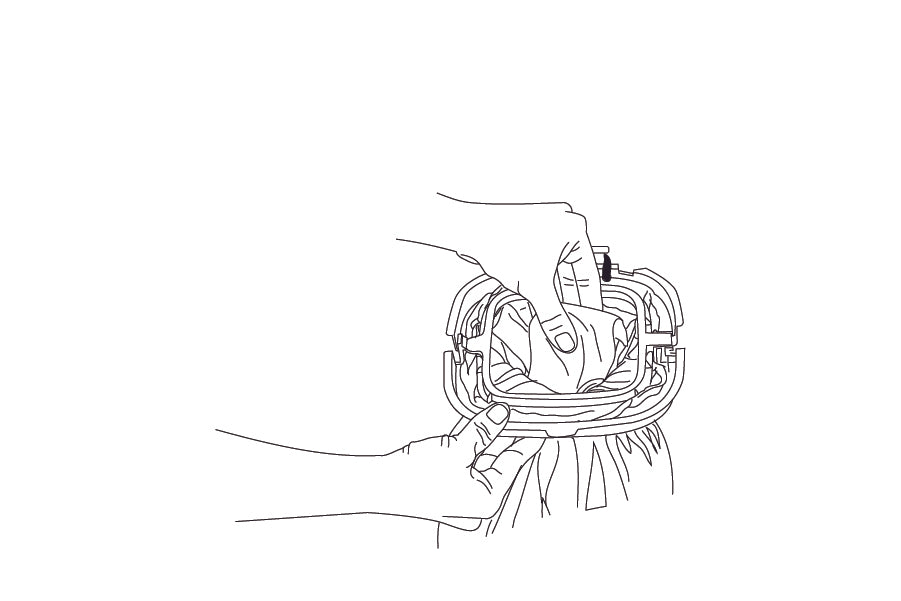
Step 2: Unsnap and raise bag pinch ring (G). Insert bottom of bag through membrane flaps (H).

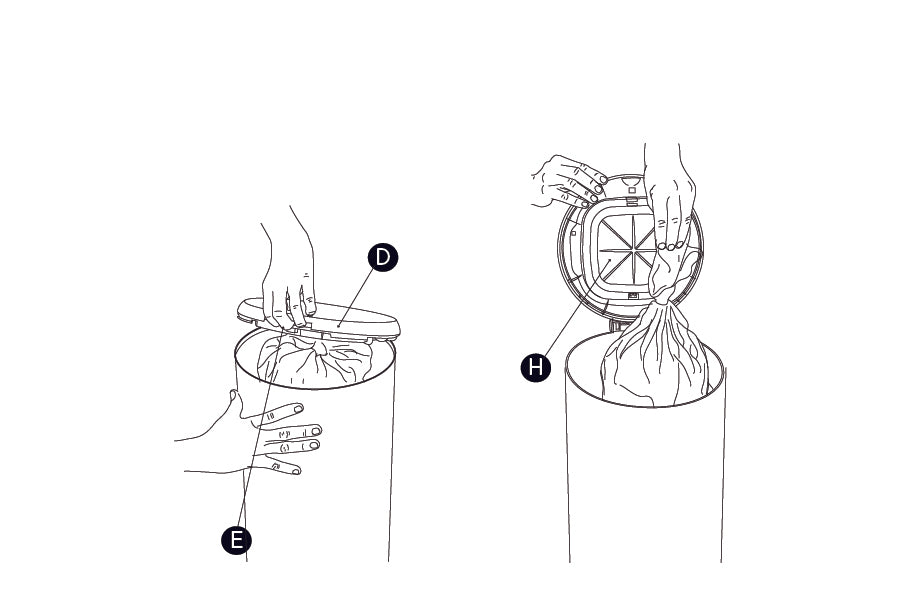
Step 3: Place edge of bag at least 1 inch beyond membrane edge (K). Snap pinch ring (G) closed over bag. For a secure hold, excess bag will stick out beyond pinch ring (G). Push lid closed. Slide child safety lock (A) closed.
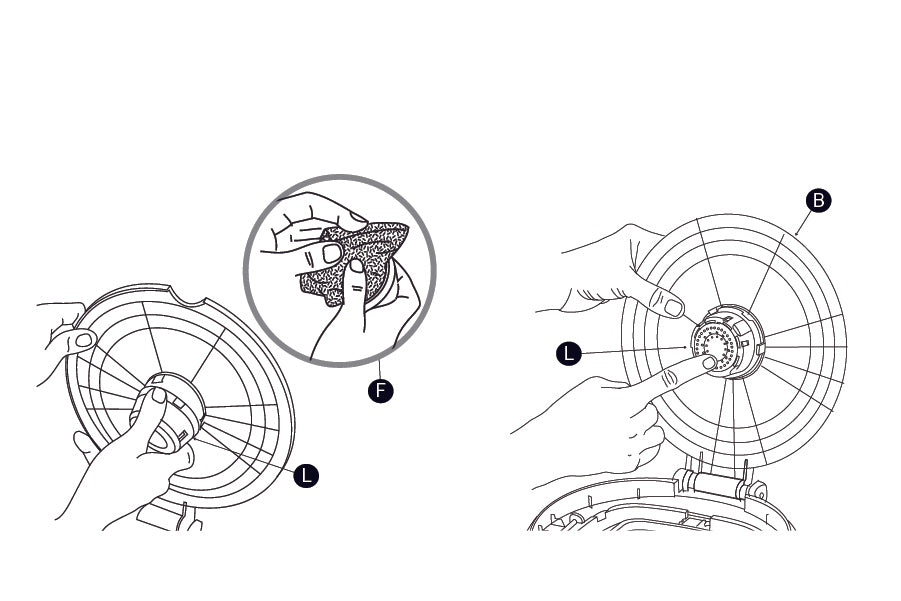
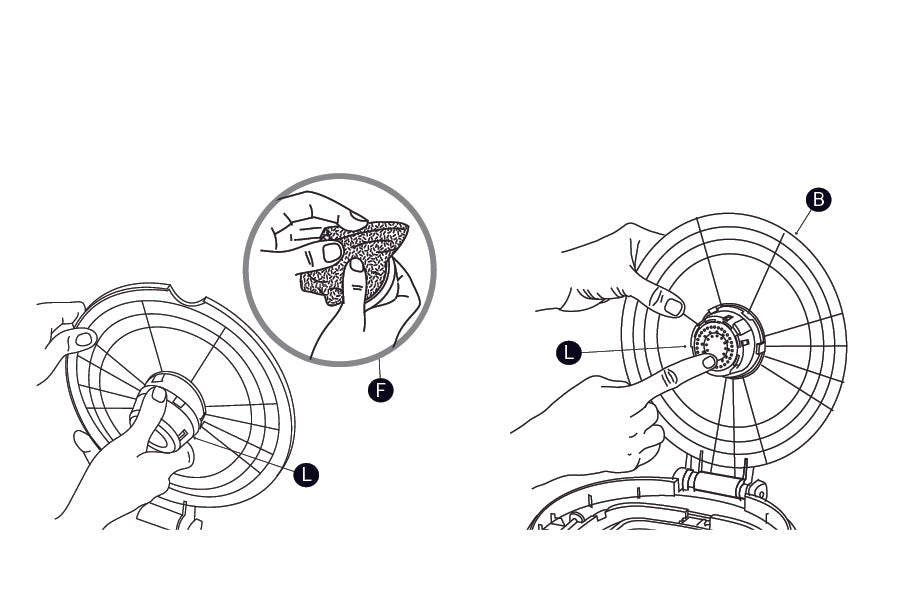
Step 4: Unsnap filter cup (L) from top of lid. Remove charcoal filter (F) from packaging and place in Filter Cup (L).
NOTE: If membrane flaps (H) remain open due to excess weight, halfway open membrane door (I) using finger flap (J) on right, then snap shut. Membrane flaps (H) should close and diapers should fall.
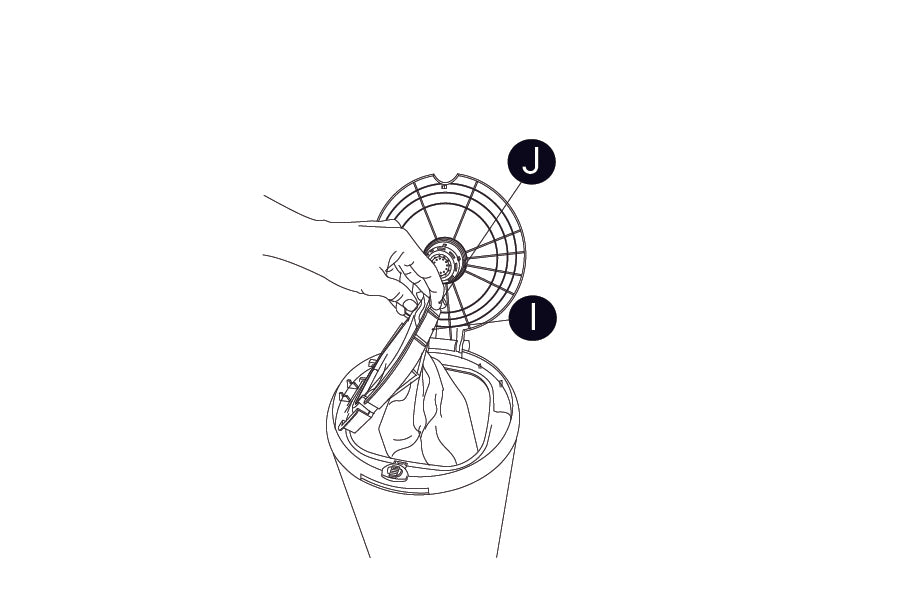
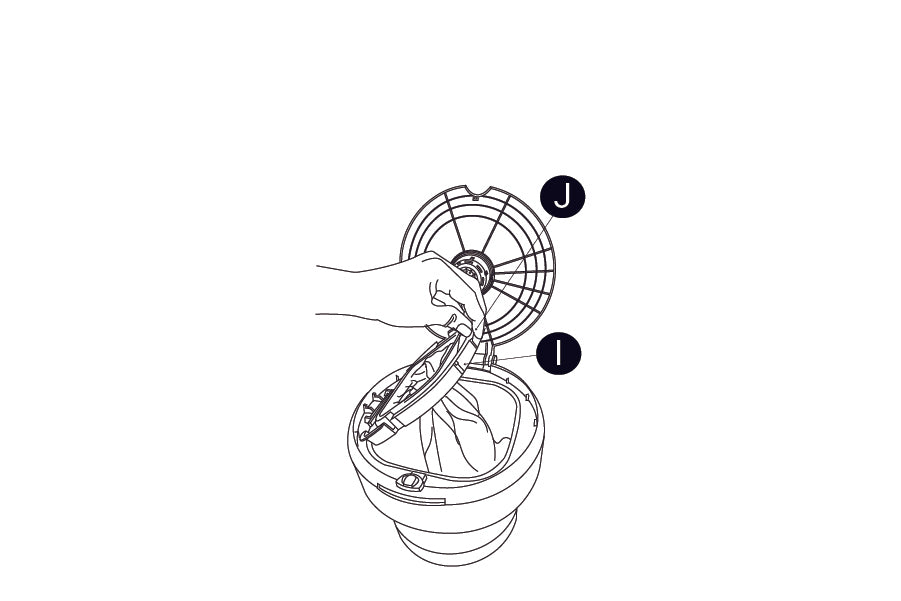
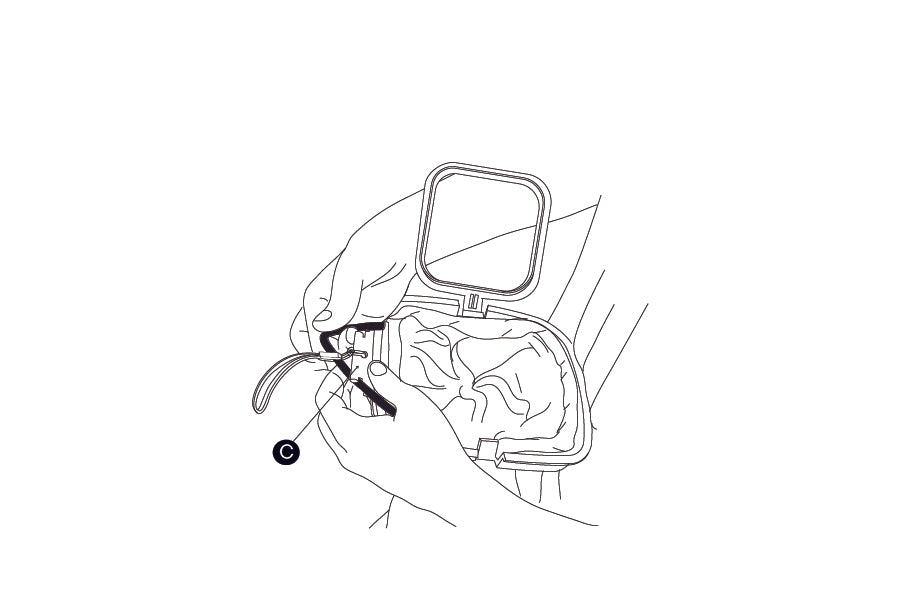
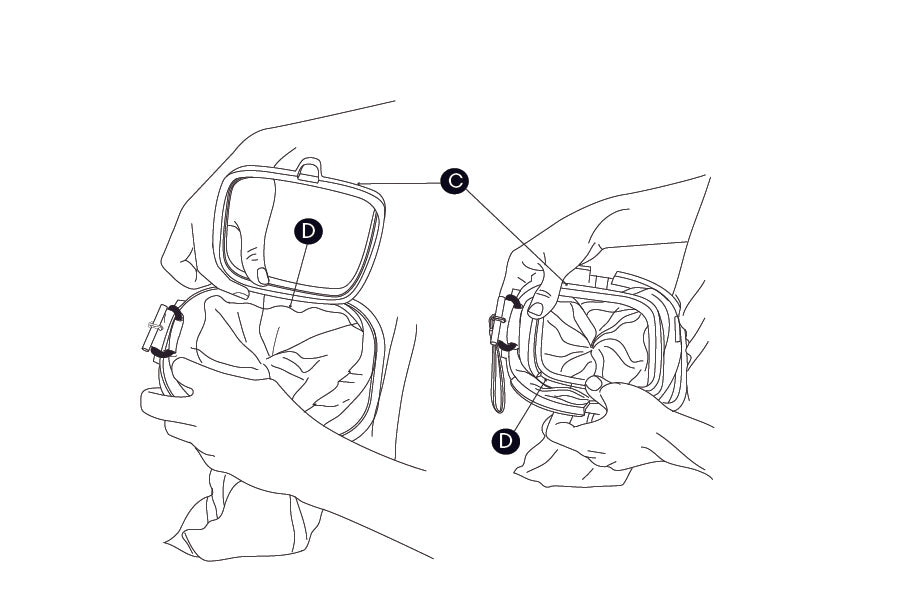
Removing a PurePail Bag. Step 5: Unsnap pinch ring (G) to release bag. Pull up bag, tie knot, then push knot below membrane flaps (H). This will keep the smell locked inside. Lift membrane door (I) using finger flap (J) on right side. Remove bag.
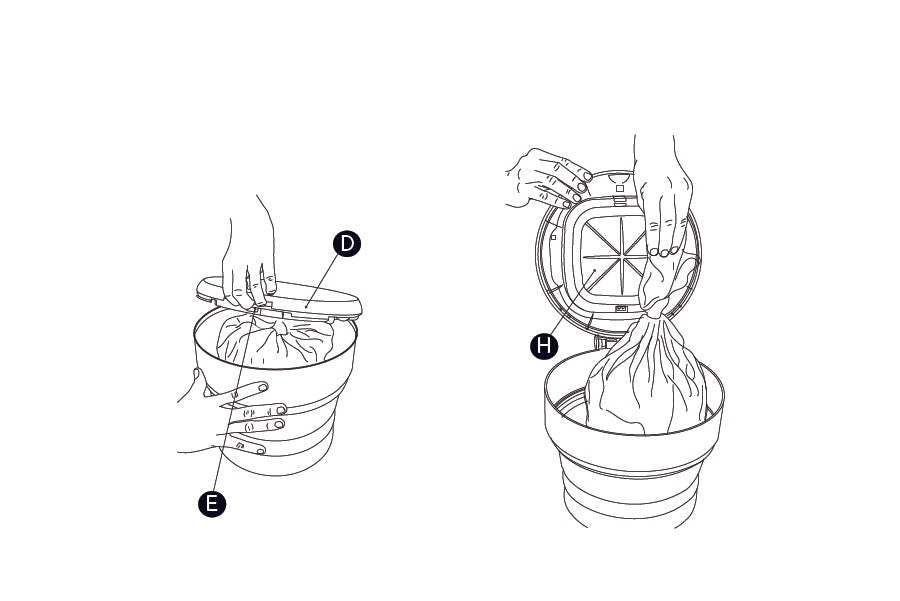
In a pinch, you can use a standard trash bag! Follow the previous instructions to install a standard trash bag in the PurePail™. When a standard trash bag is full of diapers it will not fit through the membrane door (I) when removing. After pushing the regular trash bag knot below the membrane flaps (H) open the entire PurePail™ top (D) using the PurePail™ top finger slot (D) located at the front of the pail.
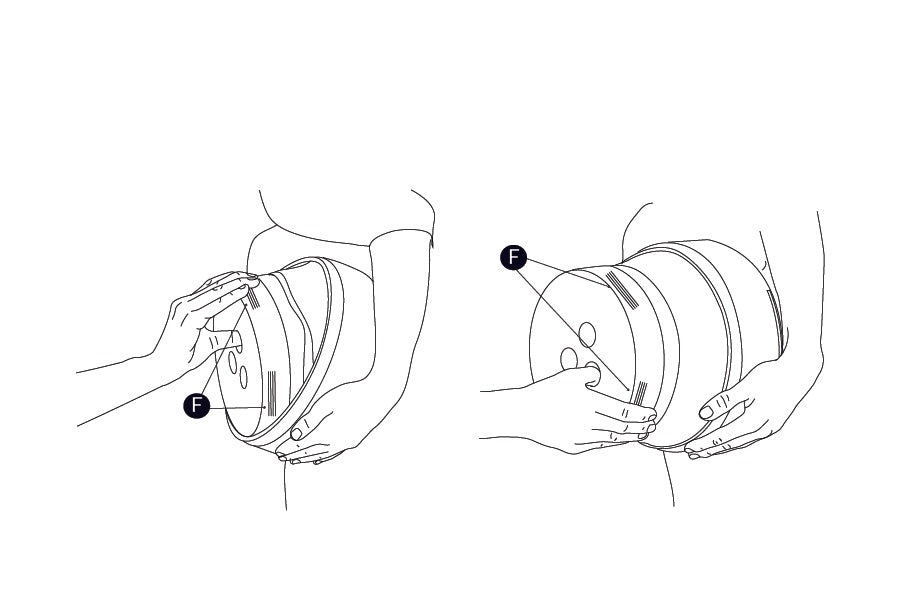
Step 1: Slide safety lock closed. Hug pail close to body with one arm. Place thumb in hole and fingers on textured grip (F) on bottom side of pail. Pull bottom away from top on an angle in a downward direction to expand middle of pail. Rotate pail and repeat to fully open.
Step 2: Tear off a PurePail™ Bag. Slide open child safety lock (A). Push textured oval spot (C) to raise lid. NOTE: If lid does not pop open, ensure entire PurePail™ top (D) is fully closed.
Step 3: Unsnap and raise bag pinch ring. Insert bottom of bag through membrane flaps (H).
Step 4: . Place edge of bag at least 1 inch beyond membrane edge (K). Snap pinch ring (G) closed over bag. For a secure hold, excess bag will stick out beyond pinch ring (G). Push lid closed. Slide child safety lock (A) closed.
Step 5: Unsnap filter cup (L) from top of lid. Remove charcoal filter (M) from packaging and place in filter cup (L). Snap filter cup (L) back into PurePail™ lid (B).
NOTE: If membrane flaps (H) remain open due to excess weight, halfway open membrane door (I) using finger flap (J) on right, then snap shut. membrane flaps (H) should close and diapers should fall.
Step 6: Unsnap pinch ring (G) to release bag. Pull up bag, tie knot, then push knot below membrane flaps (H). This will keep the smell locked inside. Lift membrane door (I) using finger flap (J) on right side.
In a pinch, you can use a small trash bag! Follow the instructions to install a small trash bag in the PurePail™ Go. When a small trash bag is full of diapers it will not fit through the membrane door (I) when removing. After pushing the regular trash bag knot below the membrane flaps (H) open the entire PurePail™ top (D) using the PurePail™ top finger slot (D) located at the front of the pail.
Step 7: Collapse the PurePail™ Go by pushing the top and bottom together, or by placing pail on hard surface and pushing down.
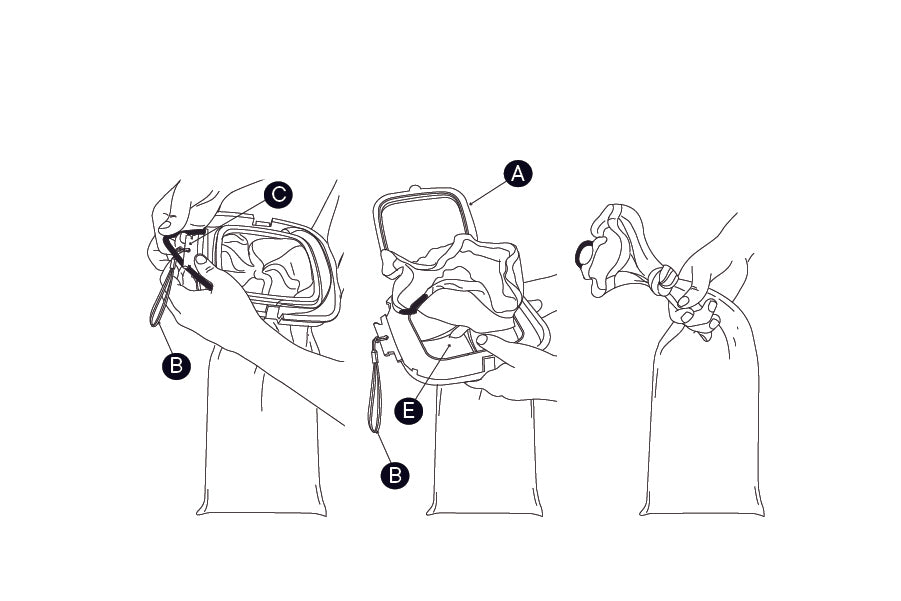
Step 1: Tear off individually sized Hang It™ bag. Open pinch ring (A). Insert drawstring side of bag through bottom of membrane flaps (E). Make sure the drawstring opening is near the strap (B).
Step 2: Loop drawstring around the black strap (B) then around the T-Hook (C). This will keep bag secure during use.
Step 3: Place edge of bag around membrane edge (D). Snap pinch ring (C) closed.
Step 4: Hang where a child cannot reach the bag.
Step 5: Insert a diaper into the Hang It™ while holding level to the ground.
Step 6: Remove bag by opening pinch ring, releasing drawstring from T-hook (C) and strap, and pulling bag through membrane flaps (E).